Tesla's 'Spring Update' Introduces Cabin Filter Health Monitoring
Tesla’s Service Mode, a feature that enables both users and technicians to diagnose and view vehicle information, has recently been updated with several new functionalities. Notably, for everyday Tesla owners, it now includes a health meter for the vehicle’s cabin filter.
Cabin Filter Condition
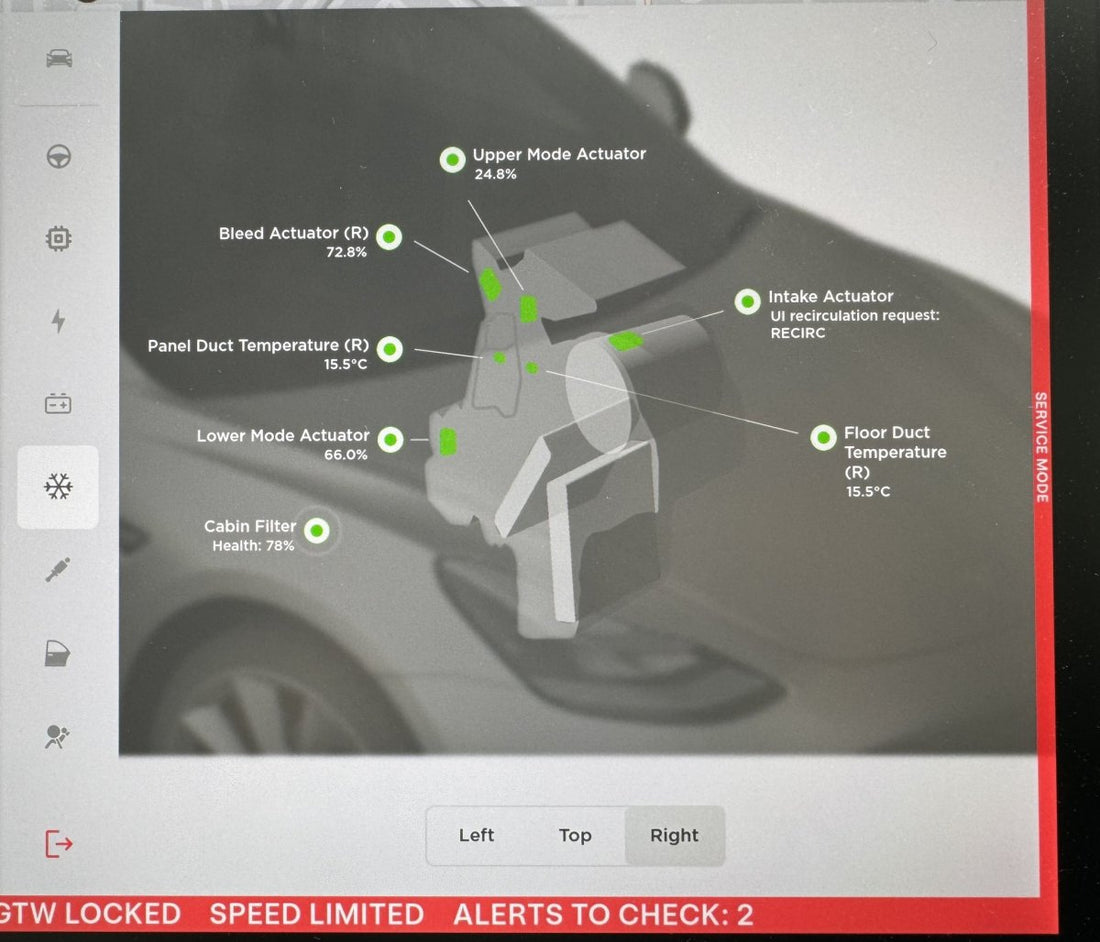
The update introduces a "Cabin Filter Condition" interface in the HVAC section of Service Mode. This display shows the filter's condition as a percentage, where a lower number signals the need for a filter replacement. Interestingly, some users have reported values exceeding 100%. The condition meter is designed to give an estimate of the remaining useful life of your Cabin Air Filter.
Tesla likely estimates the condition of the cabin filter based on its age and the total hours the HVAC system has been in use. Additionally, it may take into account the fan speed to factor in higher airflow through the filter.
When to Replace
Tesla's Cabin Air Filter Replacement Recommendations
In general, Tesla suggests replacing the Cabin Air Filter every 2 years. For vehicles equipped with the Bio-Weapon Defense Mode featuring the HEPA filter, replacement is advised every 3 years. However, individual replacement intervals may vary based on usage patterns and the volume of debris entering the cabin.
Tesla distinguishes itself by continuously circulating air through the cabin filter, whether it originates from outside or inside the vehicle, even when the recirculating air option is engaged. This ongoing filtration process contributes to maintaining cleaner air within the vehicle.
How to Replace
Replacing the Cabin and HEPA Air Filters in Your Tesla
Replacing the Cabin and HEPA Air Filters in your Tesla is a relatively straightforward task and could be done as a DIY project. Tesla provides detailed instructions tailored to each model for this purpose, but the general steps are outlined below.
It's important to note that the replacement procedure may vary depending on the model year. Additionally, since high-voltage connections run through the HVAC module, extra caution is necessary. We highly advise reviewing the specific instructions provided for your vehicle before proceeding, as they will caution against touching any electrical connections.
Basic Replacement Instructions
1. Disable Climate Control
2. Take out the floor mat on the passenger side and adjust the seat all the way back.
3. Employ a pry tool to unlatch the clips securing the front footwell cover on the right side of the instrument panel, then disconnect the two electrical connectors inside.
4. Start from the top and work your way down, using a trim tool to detach the right-side panel from the center console.
5. Use a T20 screwdriver to remove the single screw securing the cabin filter cover, then take off the cover.
6. Fold back the tabs holding the filter in place, and then pull out both the upper and lower filters.
7. Make sure the arrows on the new filters are pointing towards the rear of the vehicle, then install them.
8. Follow the steps in reverse order (from step 6 to step 1) to reassemble everything.
Once more, these procedures differ depending on the vehicle configuration and model year, and they are not applicable to older vehicles lacking a heat pump.